• When you click on links to various merchants on this site and make a purchase, this can result in this site earning a commission. Affiliate programs and affiliations include, but are not limited to, the eBay Partner Network.

1971 440-6 Superbee in progress

cdkmbjones

Active Member
Joined
Jan 2, 2018
Messages
28
Reaction score
5
Location
Manorville NY
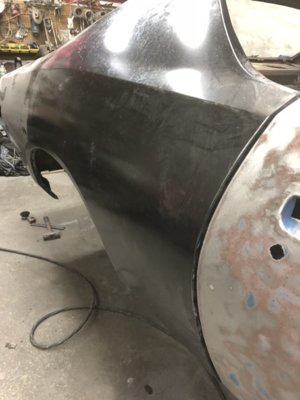
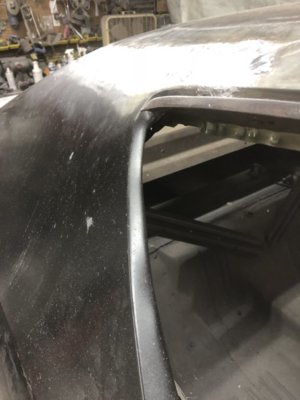
Passenger quarter hung, tacked into place a few days ago. Over the past two days I hung the doors and fenders temporarily to make sure the edges of the quarters had the correct contours to the door edges. Finished final spot welding on both sides. Started work on the doors and fenders today and did the lead work on the tops of the quarters at the roof seam
DFD946C2-0EF3-4110-A2E4-68E22A9990CE.jpeg

98B5FE03-68DE-4BF6-89D3-E74C7DC3C070.jpeg
 

cdkmbjones

Active Member
Joined
Jan 2, 2018
Messages
28
Reaction score
5
Location
Manorville NY
I buy a great deal of my supplies from Eastwood, then some things like the paint at the local Kemperle auto body supply. In the case of the lead, I used the Eastwood lead kit, which uses 70/30 lead sticks. You might be thinking of the "lead free Solder" but I don't trust that stuff. The real lead flows nice, shapes nice and makes for a great foundation at those critical seams. The hard part is getting the area really clean, especially in all the little recesses and between the welds.
 

halftrackman1

Well-Known Member
Joined
Jan 20, 2018
Messages
49
Reaction score
19
Location
tn.
Wow my first post on here, I new here, I am working on a 70 challenger six pack, my nephew is working on a 67 gtx, so we mopar nuts. Thanks for the great pictures, it not easy to resto and take pictures too
 

cdkmbjones

Active Member
Joined
Jan 2, 2018
Messages
28
Reaction score
5
Location
Manorville NY
Looks great, what do you use too blast off the paint and rust.
If I had a dipper nearby I would have gone that way and saved myself a LOT of work. However living on Long Island NY, the environmental and government know it alls have all but killed all of those industries. So, the only commercial method out there for me was to either send the car to someone who will media blast it OR use one of those Dustless Blaster guys who come to your house, set up and do the work there. I called the local Dustless guy and he wanted $1400 to do the car so I decided to just do it myself. It took two or three days and what I did was weld some trailer hubs I bought off ebay onto the ends of my rotisserie, and mounted some old golf cart tires I had laying around from a lift I had done on a friend's golf cart. That allowed me to roll the whole assembly out into the gravel. Then I used a wire wheel on my grinder to get off the big rust and scale. Next I used a pressure blaster I bought at Harbor Freight tools and a 50lb bag of glass bead, mixed with a 50lb bag of silicon Carbide to cut through the medium paint and rust. Then finally I went over everything and the panels with just light paint with a soda blaster and a 50lb bag of soda I bought at Harbor Freight tools. It worked, but what a mess and a lot of time and work. When it comes time to do the 69 Roadrunner I have, I am going to bite the bullet and pay the Dustless Blaster guy to come and do it. I saved money for sure but I missed spots and had to go back over them, and for weeks every time I moved the car around to weld, out some more glass bead or soda that was hiding up in some area. And I cleaned the car three times, still there was residual blasting media. Lesson learned. This car has been by far the most involved restoration I have ever done and I have done many over the years. I have done restoration work for myself and for others for over 35 years. This one was big and I wanted this one to be better than any other before due to the rarity and value of this car.
 

cdkmbjones

Active Member
Joined
Jan 2, 2018
Messages
28
Reaction score
5
Location
Manorville NY
Wow my first post on here, I new here, I am working on a 70 challenger six pack, my nephew is working on a 67 gtx, so we mopar nuts. Thanks for the great pictures, it not easy to resto and take pictures too
That's for sure, plus when you are deep into the work, you forget to document something that should be. My goal here was to help others as I go. This way if someone is attempting something similar maybe my experience can help them. I am more than willing to answer questions. I am an ASE Master Mechanic, ASE master Body Tech, and a licensed Mechanical Engineer. These days I am slowing down at my main job and focusing my attention on my passion - Mopar classic cars. Some for me and some for others. I am working out of a simple 22x28 detached garage at my home that I build about 20 years ago and set up specifically for the purpose of restoring cars. So, at times its a bit of a disaster - like today, but I have just about every tool and setup you can need to do a car from start to finish. That is except land space to do more than one at a time
 

Russ69Runner

Well-Known Member
Joined
Aug 4, 2016
Messages
7,705
Reaction score
3,244
Location
Lake Wales Fl.
I used the led free on the upper cowl to A pillar's. Going to use all steel on the rest of the Lead joint's. Don't like heat on my treated metal. After looking at all the old car's that they used lead on. It seam's to be where they rust out firs or worst. How ever you look at it. Look in to the cold product's being used in stead of lead or solider. Will let you know how it turn's out. So far looking good on your car. Still have to cut and fit these AMD parts so things will fit rite. Keep up the good work and the pic's coming. :thumbsup:
 

halftrackman1

Well-Known Member
Joined
Jan 20, 2018
Messages
49
Reaction score
19
Location
tn.
Well, glad to have some body Tech,s on here. I am more the mechanic. My nephew has a great setup a big shop. He got a 57 jag with a viper engine and several mopars. I like looking at pictures of any mopars I will have him send pictures if anyone interested. I,ve had several used mopars , first new car was a 68 red road runner, last was 71RR. What engine are you going back with. My challenger has the six pac , I got all new parts, but using the 11inch fly wheel and cast bellhouse, I had the pp and 18 spline disk in stock, money money. I doing the best I can with what I got. When you have the time send pictures and good mopar stories. This is my kind of fun. Wendell :thumbsup:
 

Russ69Runner

Well-Known Member
Joined
Aug 4, 2016
Messages
7,705
Reaction score
3,244
Location
Lake Wales Fl.
Going to stick with the 383 motor with a four speed. I would like to be able to afford to drive it. :lol: Still have to buy the hole inside of the car. It was striped to paint and all it had was two bucket seats and the back seat. With some kind of automatic floor shifter. Yep post some pic's in projects.
 

cdkmbjones

Active Member
Joined
Jan 2, 2018
Messages
28
Reaction score
5
Location
Manorville NY
Going to stick with the 383 motor with a four speed. I would like to be able to afford to drive it. :lol: Still have to buy the hole inside of the car. It was striped to paint and all it had was two bucket seats and the back seat. With some kind of automatic floor shifter. Yep post some pic's in projects.
Do you have pics of where you are on your project?
 

Russ69Runner

Well-Known Member
Joined
Aug 4, 2016
Messages
7,705
Reaction score
3,244
Location
Lake Wales Fl.
Thanks Guy's. If one picture helps another Runner owner with their project then I make me Happy. Oh by the way I bought my bird in a box. :poke:
 

quikbird

Well-Known Member
Joined
Mar 1, 2014
Messages
3,233
Reaction score
1,028
Location
Sarasota, florida
that is always fun, never know if you have everything and never know what you are missing until put it together and then have to wait until can find the missing pieces. :BangHead:
 

cdkmbjones

Active Member
Joined
Jan 2, 2018
Messages
28
Reaction score
5
Location
Manorville NY
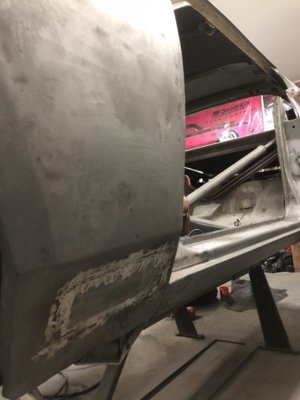
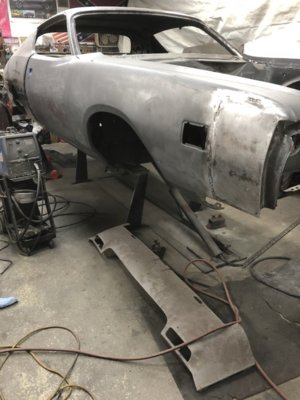
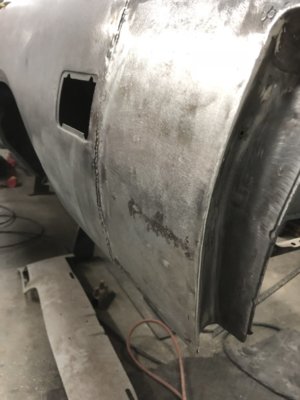
So, been a few days since my last post but I have been working every day on this project. As of last weekend, front and rear full floor pans done, full trunk pan and both drop downs done, both full quarter panels done. Now onto the removable panels- both doors, both fenders and the trunk lid. Forgot I never finished stripping them before it got cold out so as weather has allowed I have been blasting them on all sides. Of course found hidden old work that I did not know was on my so called “clean panels” so now I am doing repair work to them as well. On the right front fender it must have been hit at one point and repaired as a collision job. I found 14 holes drilled under body filler, holes used to attach a slide hammer from the outside to pull out the dent. It was like damn Swiss cheese dripping with body filler. So, I opted to cut out the whole section and weld in clean metal and grind smooth. Found similar holes in all 5 panels but nothing like this. So every panel has required metal repair and hole welding but today I am hopefully wrapping them up and getting them to bare metal. Here are some shots. My goal is to finish everything up by mid week next week so I can clean up the work area and prepare to apply epoxy sealer primer to the whole car and all the removable parts. Then the work of smoothing everything begins.

878AB6D6-41EA-4D3F-B795-2F5BAE4A8747.jpeg

B5B2BEBF-B109-4DE6-8AF3-6ADFEB8B6D55.jpeg

35A334DC-3817-497F-A91B-B78099C9AD00.jpeg
 

Russ69Runner

Well-Known Member
Joined
Aug 4, 2016
Messages
7,705
Reaction score
3,244
Location
Lake Wales Fl.
Look's good as a body shop would do or probably better because it is your car. Spent all day adding metal to the rear quarter wheel tub lip that the factory cut me short. It was small piece but it had to be done to have enough metal to make the plug weld meet up with the wheel tub lip. Good job. Figure will have at least a month in the body prep before painting. Lot of block sanding. Will spray the hole car with feather filler then fill the low spot's with skim coat. I am using cold joint's on the lead area's that get leaded. Had to use the solider on the A pillar where it met the upper cowl area. No choice. A lot of heat their that make's metal rust oh no rust. Saw where a friend of mine did the quarter to roof joint the next morning rust had popped up way past the joint area. Not to mention what it would look like on the back side we can't see. Looking at all these old cars it seems to be the problem area for most of them. So will let you guys know how the cold joint work's for me. Using all steel compound in these area's. If any one has used this let me know.
 

Sixtynine_Bird

Well-Known Member
Joined
Nov 30, 2014
Messages
654
Reaction score
125
Location
France
Looks good and solid! Nice job on that, we can find lots of surprises under that body filler sadly... I know what I'm talking about with what I found on my birdlol

Keep up the great work :thumbsup:
 

dmartin

Well-Known Member
Joined
Aug 30, 2013
Messages
952
Reaction score
344
Location
Georgia
Looking forward to the finishing touches looks great big guy
 
Back
Top