You are using an out of date browser. It may not display this or other websites correctly.
You should upgrade or use an alternative browser.
You should upgrade or use an alternative browser.
Pic's of Cowl section
- Thread starter Russ69Runner
- Start date
SgtLee511
Well-Known Member
Looking Very Good Russ
First, it looks like you still have a lot of lead to be removed before you continue. Second, the area you're concerned with got leaded over on the forward face and the dash covered the lower surface once its installed. The solution would be to put seam sealer in the groove after the windshield is installed to keep moisture out of that area.
How is the fit of the cowl on the firewall lip - particularly wher it runs across and then turns up. I'm in the process now and it doesn't fit well there at all - big gaps !!
How is the fit of the cowl on the firewall lip - particularly wher it runs across and then turns up. I'm in the process now and it doesn't fit well there at all - big gaps !!
Russ69Runner
Well-Known Member
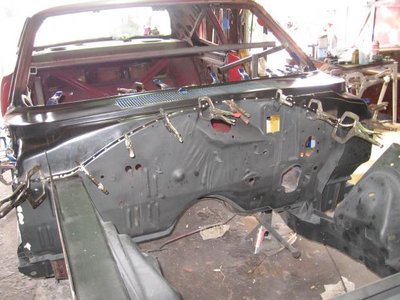
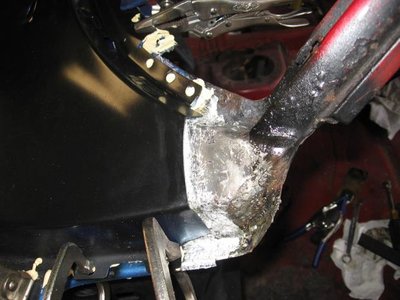
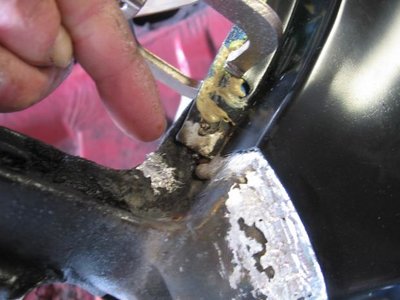
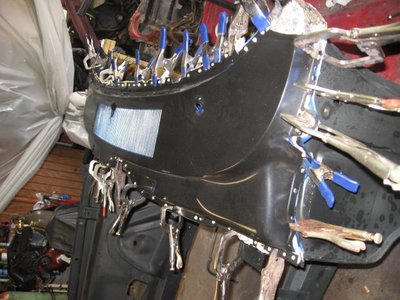
Their was and issue around where the door pillar post area was used a lot of seam sealer under all parts before putting upper and lower cowl sections on to in sure a good seal. No did not seal the drain hole someone had done that before and it rotted out the lower cowl section around the fresh air vent duct's. Used a lot of clamp to pull thing tight together. What you see is solider that I have applied like the factory did where the cowl fit's over the A arm bottom to fill gap's then will use some body filler to smooth it all out. Don't like bond o bad word in my thought's. Thanks for info. Russ. :encouragement:
You're not going to be able to weld through that solder at all. You need to remove all of it, grind to bare steel, weld and THEN you can lead the are. I know ... the gap is HUGE - but that's what has to be done (or make a small patch panel to fill that gap first.
In hindsight I was stupid not to leave some of the original cowl there to butt to but mine was VERY rotten in those areas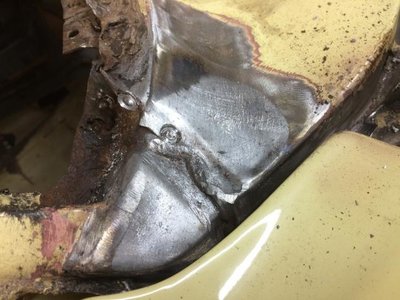

In hindsight I was stupid not to leave some of the original cowl there to butt to but mine was VERY rotten in those areas


Last edited:
Russ69Runner
Well-Known Member
My A Pillar was rotted off had to repair it on both side's. When I removed the cowl section's were not welded at the A pillar was leaded their. Cut behind it to get the cowl off about two inches that part was would not come off heated it with torch lead came out and it came free. They shaped and filled the to the A pillar with lead and no welding. It was welded to fire wall and around the top of pillar post then to the A pillar support's. That is what I found when pulling it apart. Thanks for the info and hope this will help you in your build. Russ. :wave:
peresvet24
Well-Known Member
What kind of hermetic paste do you use? I do not have experience in "restoring body" but I want to know how to do it correctly???
Russ69Runner
Well-Known Member
Got my Kit from East Wood came with most every thing even a DVD but just take the info and do what you can. The wood paddle dose not work in tight places used a metal putty knife and brazing tip on my oxygen setline torch worked better in tight places and use the putty knife like a solider tip heated it while spreading the solider. Worked pretty good. New to me but if you take you time it will work. Like welding up and down is hard but flat surface is easy. Control of the solider or led is every thing. Russ. :yesnod:
Sixtynine_Bird
Well-Known Member
That is a nice job you've done here! 
Keep up like that! ;)
Keep up like that! ;)

