• When you click on links to various merchants on this site and make a purchase, this can result in this site earning a commission. Affiliate programs and affiliations include, but are not limited to, the eBay Partner Network.

The Oregon Trunk Pan Project

Basketcase

Keeper of the Green
Joined
Sep 10, 2008
Messages
14,415
Reaction score
299
that's a damn shame, but at leat you'll know for sure what you have when it's all done. still a great car! and since the wife found the chipped paint,,,can't you blame it all on her? :jester:
 

BBillyC

Well-Known Member
Joined
Mar 2, 2009
Messages
460
Reaction score
3
Location
Winnipeg, Canada
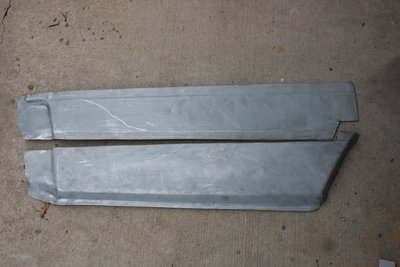
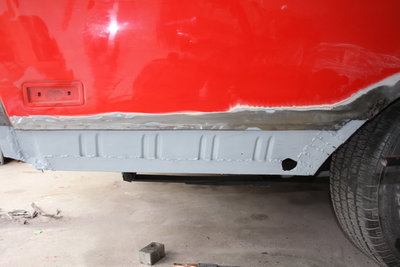
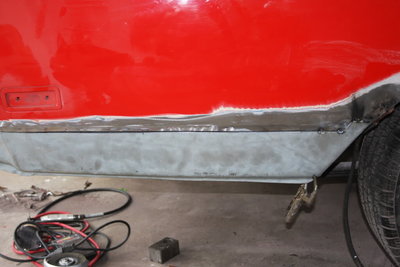
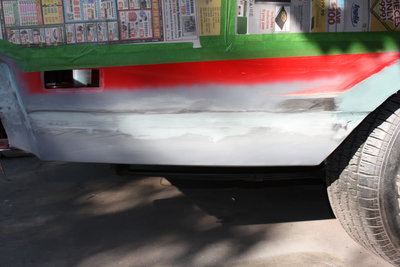
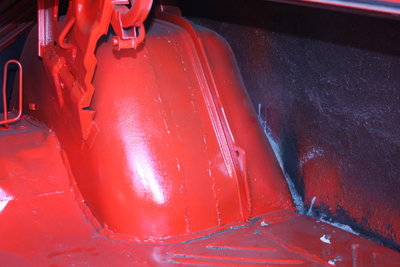
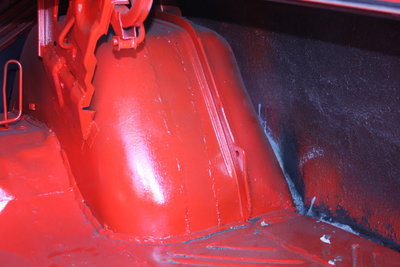
So here are some pics of what Ive done. Cut the patch panel to what I needed, stiffened the trunk floor extension, fitted the cut patch panel. (actually I cut the panel first then marked the lower quarter on the car then cut it). Welded it all together and began filling. On the bare metal I used metal filler, then the pictures shows here the second coat applied of lite bondo. I threw in a photo of the mini-tub job I did as well. Enjoy.

Patchsection.jpg
rebuiltex.jpg
beginningfit.jpg
IMG_2859.jpg
IMG_2860.jpg
 

Basketcase

Keeper of the Green
Joined
Sep 10, 2008
Messages
14,415
Reaction score
299
you do great work. :thumbsup: love how you did the mini tub. so just how friggin hard is it to do the job right the first time, instad of slappin the bondo and lying to someone? :soap:
hey .....ah....since you are in the 1/4 repair mode...with all the tools out anyway........ :D
 

BBillyC

Well-Known Member
Joined
Mar 2, 2009
Messages
460
Reaction score
3
Location
Winnipeg, Canada
Thanks for the support guys. The work is not hard to do if you have some basic skills. Disk cutters and basic welding skills help as well. When it comes to body work (applying bondo) I'm no pro so I just keep working at it till it looks right and I probably take ten times longer than someone with the feel. I make my own sanding shapes for details out of rigid styrofoam (the blue stuff) as it is easy to shape and holds up well under pressure. For painting I just have a small compressor and a touch up gun...thats how I painted the whole car. Surface prep is everything and spending the hours color sanding is a pain. I see body work and paint on cars which is just flawless and I try to get there but really I'm not close. Just try to do the best I can and learn as you go. I don't know how much more of this that my wife can take though.

Going to Chicago to see the Eric Clapton Crossroads concert. anyone planning on being in the area on June 25 or 26th....a coffee would be great.
 

BBillyC

Well-Known Member
Joined
Mar 2, 2009
Messages
460
Reaction score
3
Location
Winnipeg, Canada
Well the quarter is primed and I am going to re-stripe the hood. Maybe tomorrow if I can get out of work early and before the mosquitoes get to nasty. So far so good. I really want to take it for a drive this weekend.
 

BBillyC

Well-Known Member
Joined
Mar 2, 2009
Messages
460
Reaction score
3
Location
Winnipeg, Canada
I was finishing color sanding it and had a slight burn through. When I got some more paint it didn't match so I had to do the whole thing over again. It seems that didn'g work to good either. When I had it all sanded I wiped it with clean rags and when I painted it the paint fish-eyed. Found out later that the rags were put in the dryer with a fabric softener towel. I guess the rag had fabric soften on it and when I painted the hood you could see where I wiped. What a mess. I sanded most of it out but it is acting funny. I'll let it sit for another day or two to see if it hardens up OK. The quarter turned out fantastic...looks like brand new. Put the bumper back on tonite and color sanded the quarter and buffed it...looks great.
 

Jim S.

Well-Known Member
Joined
Aug 3, 2009
Messages
1,798
Reaction score
0
Location
White Bear Lake, Mn.
Great metal work! Wish I was that good also. :thumbsup: Bummer about the stripes. I've had similar issues like that over the years painting. Sometimes it seems you just can't get it clean. Vinegar/water, post sanding cleaner, reducer, nothing seems to do it. Last summer I re-did my hood stripes. Prepping them there were some areas that burned through the organisol to the original sealer. I ended up using urethane instead of the original lacquer organisol but, even so I decided to spray some thinned black epoxy sealer/primer first. Then I knew if that looked good, I had 3 days to tack it off and spray it with no more sanding. Good luck, I know how frustrating some of those jobs can be.......
 

andy69

Well-Known Member
Joined
Apr 1, 2010
Messages
84
Reaction score
0
Location
Australia
dont worry its happened to everyone,on mine he put a new trunk pan in but welded the old rusty 1/4s on so had to grind these off and replace and yes took owners word and also he coudnt weld for shit.......
 

BBillyC

Well-Known Member
Joined
Mar 2, 2009
Messages
460
Reaction score
3
Location
Winnipeg, Canada
Wow this thread is still going. The bird is in storage while it is freezing outside. The quarters turned out fantastic and only used about 2 tablespoons of bondo to clean the weld up. Really happy with it so far. In the spring the goal is to finally paint the grille and then get some 15" classic Cragars, cut them and add a 4" section in it and pop on the monster meats. Then it will be finished, except for when I retire and a hemi will get popped in. I am trying to pattern myself after George, I love that car.
 
Back
Top